
DIY concrete planters for outdoor garden projects work best when you treat them like small masonry jobs, not kids’ crafts, because weather, watering, and freeze-thaw cycles will test every shortcut.
If you’ve ever made a planter that chipped at the rim, stained your balcony, or held water like a bathtub, you already know the appeal of “cheap and easy” ends fast once it lives outdoors.
This guide stays practical: what mix to buy, mold ideas that don’t collapse, how to add drainage without cracking, and when sealing is worth the extra step. I’ll also flag the mistakes that usually cause failures so you can avoid remaking the same pot twice.
What makes outdoor concrete planters tricky (and why many fail)
Concrete is tough, but small planters have thin walls and sharp edges, so they show problems sooner than a sidewalk does. Outdoors or on a balcony, three issues pop up most.
- Cracking from thin walls: walls under about 3/4 in often crack during demolding or after a few water cycles.
- No drainage plan: standing water stresses roots and can push salts to the surface, leaving white haze.
- Moisture + freezing: in colder regions, water inside pores can expand and spall the surface.
According to the Portland Cement Association, proper curing helps cement-based materials develop strength and durability. In real life, that translates to “don’t rush the demold, and don’t let it dry out too fast.”
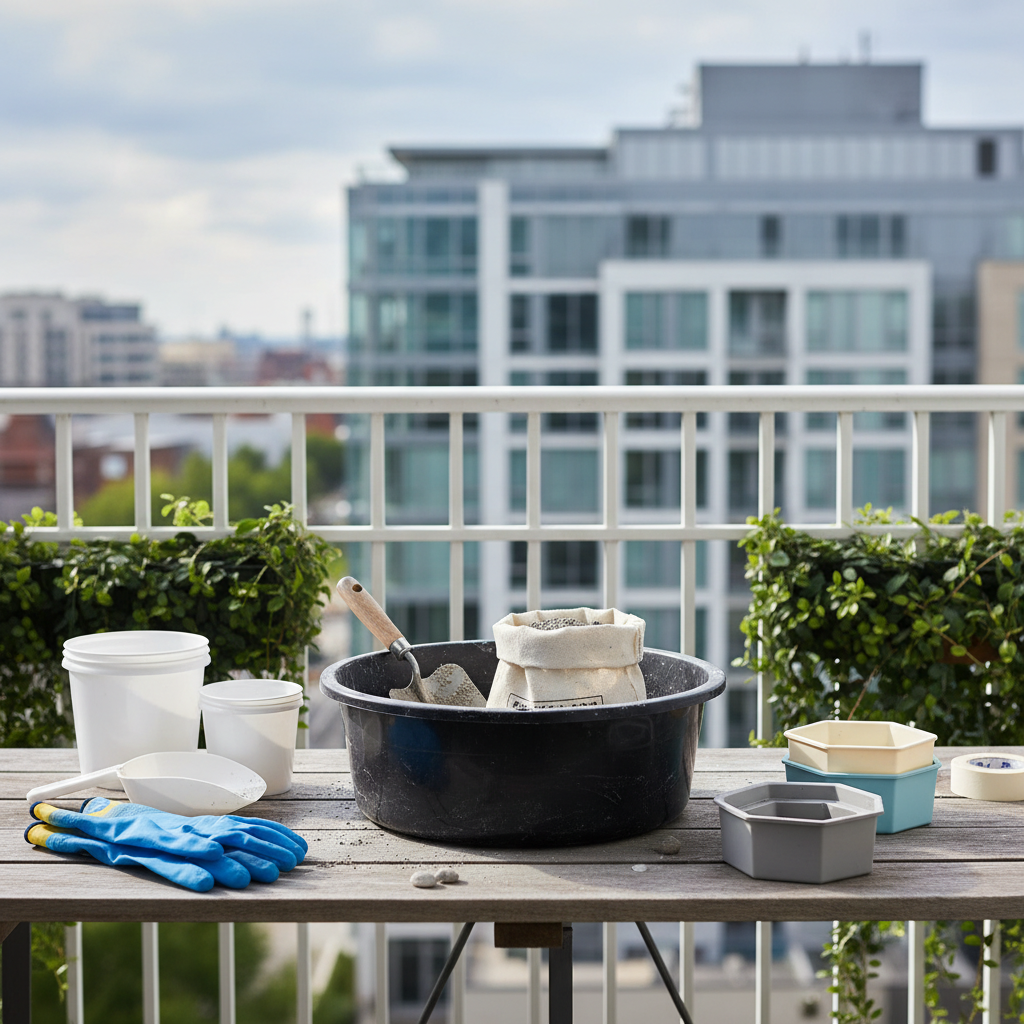
Quick self-check: which planter build fits your space?
Before you mix anything, match the build to your constraints. This is where most balcony projects go sideways, usually because weight and drainage weren’t considered.
- Balcony weight concerns: go smaller, use thinner but reinforced walls, and avoid oversized troughs unless your building rules allow it.
- Windy, sunny exposures: thicker walls hold moisture better, and darker pigments can run hotter.
- You want “smooth modern”: use a finer mix or add a skim coat, and plan on sealing.
- You want “raw industrial”: choose a standard mix, embrace small air holes, but still seal the bottom.
Materials: what to buy (and what to skip)
You can make DIY concrete planters for outdoor garden with basic bagged mixes, but the bag you pick changes the finish, strength, and how annoying the pour feels.
Recommended shopping list
- Concrete mix: a high-strength or “sand/topping mix” often gives a smoother finish than mixes with larger gravel. For bigger planters, standard concrete can work, but it’s harder to pack into small corners.
- Reinforcement: alkali-resistant fiberglass mesh, small-gauge wire mesh, or synthetic fibers (depending on what’s available). This helps thin sections survive demolding.
- Molds: nested plastic containers, silicone baking molds, or purpose-made planter molds.
- Release agent: cooking spray, petroleum jelly wiped thin, or commercial form release.
- Drainage former: a dowel, cork, foam plug, or a plastic straw bundle you can pull out later.
- Sealer: water-based penetrating sealer or acrylic concrete sealer for planters (choose low-odor if working indoors).
A practical mix guide (choose one)
| Goal | Mix choice | Why it helps | Tradeoff |
|---|---|---|---|
| Smooth modern surface | Sand/topping mix or fine repair mortar | Packs tight, fewer large voids | Can feel “sticky,” needs good vibrating |
| Fast small planters | High-strength bag mix | More forgiving, decent strength | Finish varies by brand |
| Large outdoor tubs | Standard concrete mix | Cost-effective for volume | Harder to get crisp edges in small molds |
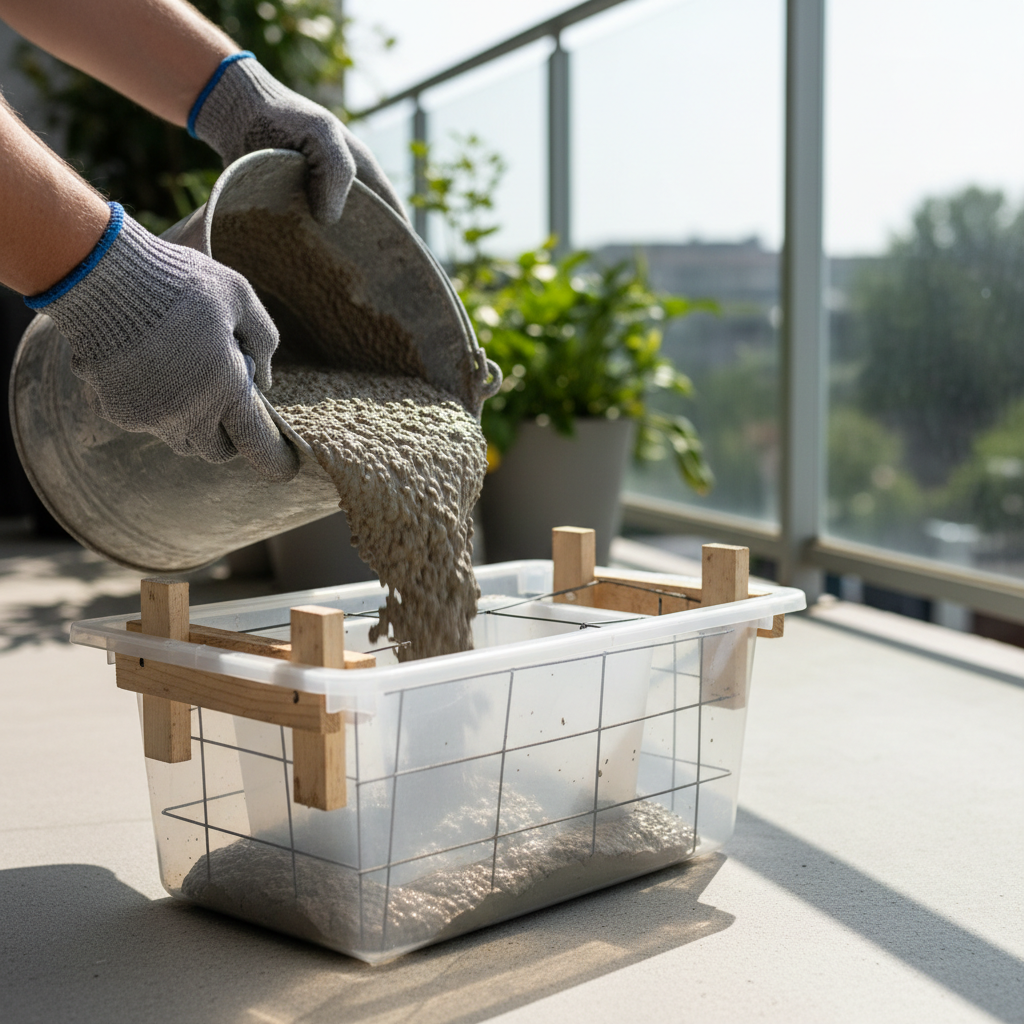
Step-by-step: build a durable concrete planter (nested mold method)
This method is popular because it uses stuff you can find at a big-box store, and it scales from small balcony pots to medium outdoor planters.
1) Plan the size and wall thickness
Pick an outer container and an inner container that leaves about 3/4–1 in wall thickness. Thinner can work with reinforcement, but beginners often crack corners during demold.
2) Prep molds and drainage
- Coat both molds with a thin, even release layer, thick globs create surface defects.
- Place a dowel or foam plug where you want the drain hole, and tape it so it cannot float.
- If you want a cleaner base, raise the inner mold slightly using small spacers so the bottom thickness stays consistent.
3) Mix to the right consistency
A common failure point is adding too much water to make pouring easy. Aim for a thick “oatmeal” or “peanut butter” feel that still packs down when you tap the mold. Too wet usually means weaker edges and more shrink cracks.
4) Pack, vibrate, reinforce
- Pack a base layer first, then tap the mold on the ground or use a palm sander (held against the outside) to vibrate out bubbles.
- Add reinforcement around the sidewalls, keep it away from the surface so it doesn’t show.
- Continue filling and vibrating in small lifts rather than dumping everything at once.
5) Cure slowly, demold patiently
Cover the mold with plastic to reduce rapid drying, and keep it in a stable spot. Many mixes feel “hard” in a day, but edges are still fragile. In many cases, 24–48 hours before demolding is safer for small planters, and longer for thicker ones or cooler temps.
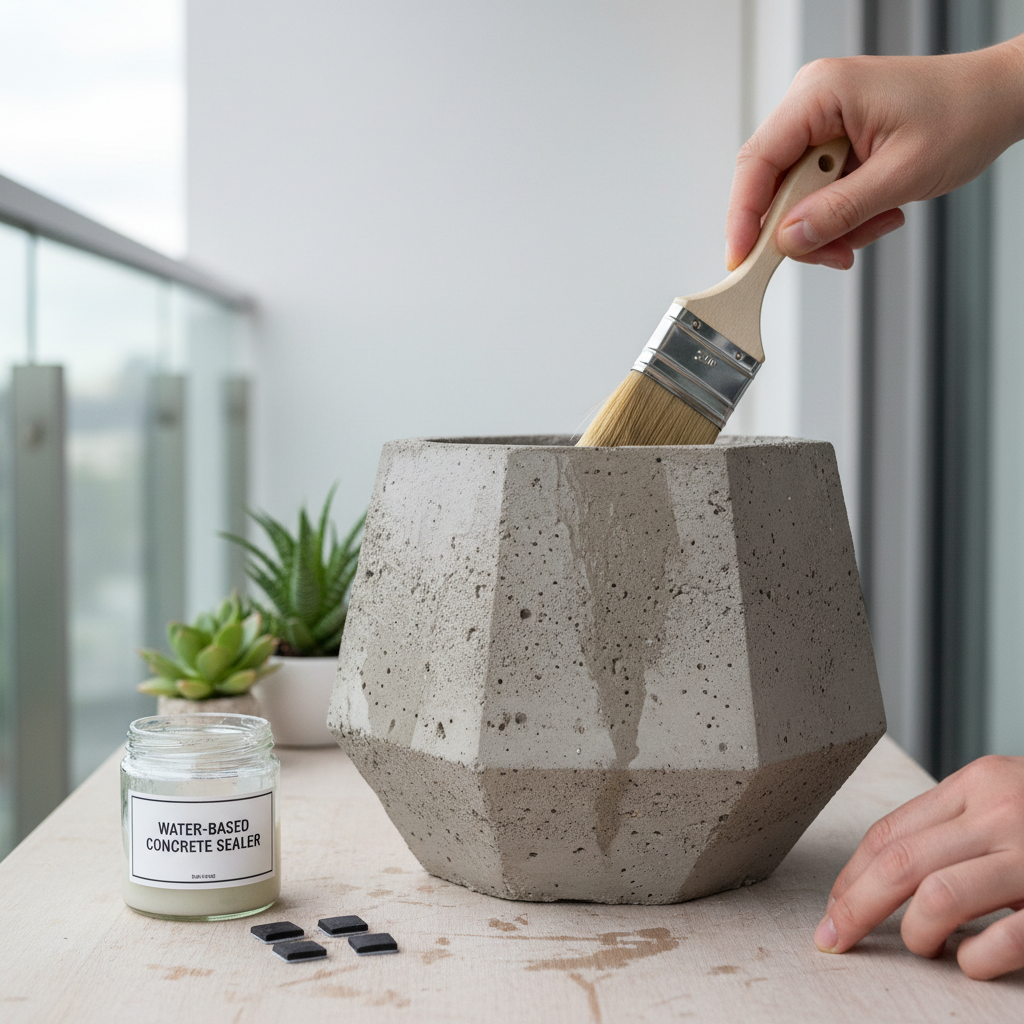
6) Finish and seal (especially for balconies)
- Sand sharp rims lightly, wear a dust mask and eye protection.
- Rinse off dust and let it dry before sealing.
- Seal the interior and bottom if you want fewer stains and less efflorescence.
For balcony use, sealing matters more because runoff can stain concrete slabs or drip to neighbors below.
Drainage and plant health: small details that make a big difference
Concrete is naturally porous, but that does not replace a real drain hole. If you’re planting anything beyond succulents, give water a path out.
- One large hole vs several small holes: one 3/8–1/2 in hole is usually enough for small planters; long troughs benefit from multiple holes.
- Don’t “fix” drainage with rocks: a thick rock layer often keeps roots in a perched water zone. A mesh screen over the hole plus a good potting mix tends to work better.
- Add feet: small rubber or concrete feet lift the pot so water can escape and the base dries faster.
Common mistakes (and what to do instead)
Most “my planter fell apart” stories come from a handful of repeatable errors. Fixing them is usually cheaper than buying special additives.
- Too much water → mix stiffer, pack and vibrate more, accept that it takes elbow grease.
- Rushing demold → wait longer, especially in cold garages; strength builds with time and proper curing.
- No reinforcement on thin walls → add mesh or fibers, and keep corners a bit thicker.
- Skipping sealer on balconies → at least seal the base and lower exterior to reduce staining.
- Ultra-sharp edges → slightly round the rim in the mold or sand after curing; sharp edges chip first.
Key takeaway: for DIY concrete planters for outdoor garden use, durability usually comes from curing + thickness + drainage, not from fancy pigments.
When to consider pro advice (or switch materials)
If you’re planning very large balcony planters, it can be smart to check building guidelines or ask a professional about load limits, because structural capacity varies by property and region.
Also consider switching to lightweight cement mixes or fiberglass-reinforced concrete if you need big visual impact without major weight. For people in hard-freeze climates, moving planters under cover in winter or using liners can reduce damage, but outcomes vary by exposure and watering habits.
Conclusion: a simple plan that usually works
DIY concrete planters for outdoor garden spaces are worth it when you build for real weather: pick a workable mix, keep walls thick enough, add drainage that won’t crack, and cure slower than your impatience wants.
If you want a clean starting point, choose one small mold pair, make a single “test pot,” and treat it like your learning batch, then scale up once you like the finish and weight.
FAQ
How long should concrete planters cure before planting?
Many people wait at least several days, sometimes longer, so the planter gains strength and dries out. If you plan to seal, let it dry fully before applying sealer, then allow the sealer to cure per label directions.
Do DIY concrete planters need a sealer for outdoor use?
Not always, but sealing often reduces staining, surface dusting, and white mineral haze. On balconies, sealing the bottom and lower sides is a practical compromise if you don’t want a glossy look.
What’s the best way to make a drain hole without cracking?
Use a stable former (foam plug or dowel) that cannot float, and avoid placing it too close to the outer edge. Cracks often happen when the hole weakens a thin corner.
Why do my concrete planters get white powder on the surface?
That’s often efflorescence, where salts move with moisture and dry on the surface. Improving drainage, reducing constant saturation, and sealing can help, but it can still show up depending on water and mix.
Can I use quick-setting concrete for planters?
You can, but it reduces working time and makes vibration harder, which can lead to more voids. If you’re new, a standard mix with more open working time is usually less stressful.
Are concrete planters safe for edible plants?
Many gardeners use them successfully, but materials and sealers vary. If you’re growing edibles, consider a food-safe liner and choose low-VOC sealers, and if you’re unsure, ask the sealer manufacturer for guidance.
How do I stop concrete planters from staining a balcony?
Seal the base, add feet, and use a saucer or drip tray if drainage could bother neighbors. In some buildings, using a waterproof mat under pots prevents long-term marks.
If you’re building a set of planters and want a more predictable finish without experimenting through multiple batches, consider using a dedicated planter mold system and a compatible sealer so your results stay consistent from pot to pot.